0 items - $0.00
No products in the cart.
Discover Kool Wrap’s top-tier heat protection products for automotive, marine, and industrial applications. Explore our range of sleeving, shields, and insulation materials today.
Applying fibreglass or volcanic-rock exhaust wrap to your Motorcycle’s header and the exhaust pipe is a simple and effective enhancement you can accomplish at home. This enhances the appearance of your pipes while also reducing burns and increasing performance.
Want to learn more about how exhaust wrap can make your ride smoother and cooler? Here are four reasons why motorcycle exhaust tape is a good idea for your ride!
When racing at high speeds, cutting down on downtime while waiting for the engine to throttle is critical. Exhaust wrap on your Motorcycle can help to prevent automatic throttling by keeping the engine cool, allowing it to operate at maximum capacity for longer periods of time.
How can exhaust wrap help to keep your engine cool? The entire system operates more efficiently and less heat returns to the engine by retaining the heat inside the exhaust system and minimizing the amount that radiates out. Hotter exhaust gas means more air is drawn through the system faster, producing more fuel.
The second reason you need motorbike exhaust wrap is to keep yourself cool when riding. While riding, Burns to your skin, clothes, and boots are typing, but they may be easily avoided by wrapping an aluminium heat shield across your header and exhaust pipe.
When compared to naked pipes, fibreglass and volcanic rock motorcycle pipe coverings can reduce the temperature radiated from your pipes by up to 50%. This decrease in temperature helps to protect you, but it can also help extend the life of shocks and fairings that are close to exhaust components.
The advantage of attaching exhaust wrap to your header is that it is inexpensive, quick, and simple to do. Motorcycle exhaust tape is the best bang for your buck when compared to other modifications. Are you ready to make your garage a hub of activity? Take a look at how to put your motorcycle exhaust heat shield wrap on at home.
While you read the word “heat shield”, it’s pretty obvious that you can easily understand its meaning. Indeed, a heat shield is a type of barrier that a device needs against heat. We use heat shields in every area where we need to control heat.
There is another type of heat shield that is known as an insulator. Its job is keeping heat inside. This type of heat shield is used in the automotive and industrial sectors. Different materials make heat shields like aluminium, stainless steel, fibreglass, basalt, and silica. You can call a heat shield with the help of the material used, just like an aluminium heat shield.
We need to control the heat in different sectors like:
As a general fact, most factories and power plants machines produce heat. Thus, controlling heat is required due to the risk of damage to electronic parts or the workers’ health.
Heatshield covers, sleeves, curtains, and tape can help keep electronic parts safe and save the worker from fatigue.
An exhaust heat shield is needed in automobiles, motorcycles, and motorboats. Exhaust shields reduce the amount of heat coming from the exhaust system. This protection is essential to make your vehicle optimally powerful and efficient.
Fireplaces in your home may create heat that may damage precious furniture or electrical appliances like TV, refrigerators etc. Thus, a fireplace needs the aluminium heat shield as a heat barrier to protect these delegate items of your home.
Naturally, firearms used in armed forces generate a large amount of heat that may damage military accessories. Moreover, unwanted heat is not good for military persons as well. Thus, heat shields are frequently used in all armed forces like the Navy, air force and Army.
Finally, heat shields are available to protect life and goods from conductive, convective heat. You need to be sure about your objectives before buying a heat shield for your personal or commercial place. Browsing the web is also a good idea to find out the correct heat barrier.
The use of various insulation materials is prevalent. However, the use of aluminium foil tape has recently gained popularity. The reasons are simple. It is practical and economical. However, not many people understand what goes in the process of insulation.
This article attempts to explain the same. It is imperative to understand something that you are reaping benefits of. Otherwise, how will you be prepared for unforeseen circumstances? Furthermore, having some general knowledge never bought anyone any harm
The objective of insulation is to reduce the heat transfer that occurs due to thermal radiation. Basically, to prevent your van from getting heated due to sunlight. The reflective surface (which is aluminium foil) bars and reflects the heat from one side. Thus, preventing it from being transferred to the other side. Overall, this reduces the amount of heat that can reach the other side by several folds.
The purpose of insulation, as we all know, is to keep the temperature in check. Using aluminium foil for this is probably the most economical and effective way of achieving the same. In addition, if you are insulating your van, it can reduce fuel consumption due to less air conditioner usage.
Installing foil insulation can be a tedious task. You are working with an aluminium sheet that is less than 0.2 mm thick. Indeed, it can get a little tricky. The process of installation includes measuring, cutting, and taping. The usage of different types of taping is encouraged for better results.
It is understandable if you require professional help. However, before you decide upon an agency to do the work, consider some crucial factors. Do they provide a genuine warranty? Will their support team be available in your area? How have other customers reviewed it?
Considering all the factors mentioned above, we recommend Kool Wrap. They ensure professional van insulation with a genuine warranty. You can also visit their website to check customer reviews. Book your service today!
As we witness increasing temperature day by day, our vehicles suffer the heat too. But the internal heat damages the engines more than the external heat. The damage to the components of the machine caused due to heat produced by internal combustion can be protected by an automotive heat shield.
While the automotive heat shield protects the engine from its internal heat, they also reduce the temperature under the bonnet, giving a performance benefit to the vehicle. The automotive heat shields are a protective cover for the elements on a vehicular engine to prevent them from absorbing, reflecting, or wasting heat.
The uses of the heat shield are not limited to just the engines. It is also used as a heat proof cable sleeve. Yes! The cables and wires all over the vehicle get heated up as quickly as the rest of the components. Although the wires and cables come with a protective layer to prevent the electric shocks they could cause, a layer of heat proof cable sleeve will increase the life of the wire.
Different cables and wires require extra protective sleeves. Your wires have various choices when it comes to heat proof cable sleeves. Some of the most popular and in-demand sleeves are-
●Spiral wraps
The spiral wraps give you the liberty to decide where the wire would enter and exit from the wrap. They are flexible and easy to get on the cables.
●Braided sleeve
These sleeves are used as heat proof cable sleeves to protect the cables and give them the required shape. Braided sleeves are available in carbon fibre, heat shrink, metal, fabric, Teflon, fibreglass, nylon, and many more materials. This gives you the liberty of choosing the material you find the best for your cables.
●Wire Loom
The wires indoors, in your offices and houses, can get damaged due to day-to-day use. The write loom tubing protects the cables from the damage that can be caused by regular use.
●Conduit
The conduit is the same as the wire loom tubing. In comparison, a conduit is done at a more significant level for applications that require the routing of optical, electrical, and low voltage connections underground or outside across extended distances.
Heat protection is necessary for the long life of the engines and the cables of your vehicles to give them a long and lasting life. Get an automotive heat shield and provide a long life to your automobile!
Travel restrictions have hampered thousands of peoples desire to travel and many are now looking at touring Australia. But with caravans in short supply and typical motorhomes costing $100,000+, there is a surge in interest in building your own motorhome.
When you add up the dollars, building your own motorhome makes a lot of sense. A quick look on Car Sales revealed hundreds of used vans and buses including a 2010 VW Transporter with 200,000kms for $15,000. Someone who is handy with tools could easily add cupboards, a fridge, sink and bedding for under $10,000. And off you go. You’re ready to explore Australia for under $25,000.
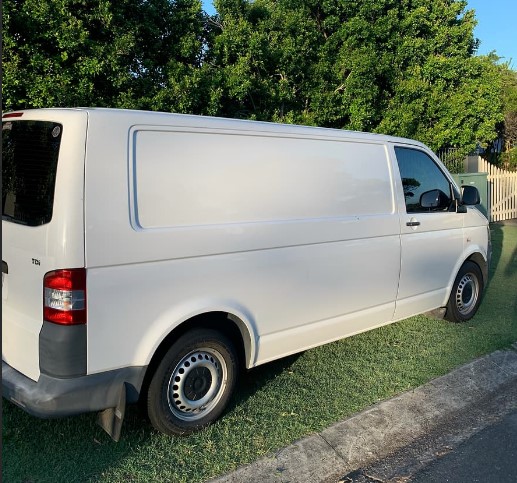
Kool Wrap now offers Van Sound and Heat insulation kits for all popular sized vans to make your road trip even more comfortable. Courier vans and buses are built to a price and come equipped with minimal creature comforts and if your travel plans include a trip to the northern half of Australia, van insulation will be a must. A van left in the sun could see interior temperatures exceeding 50°C.
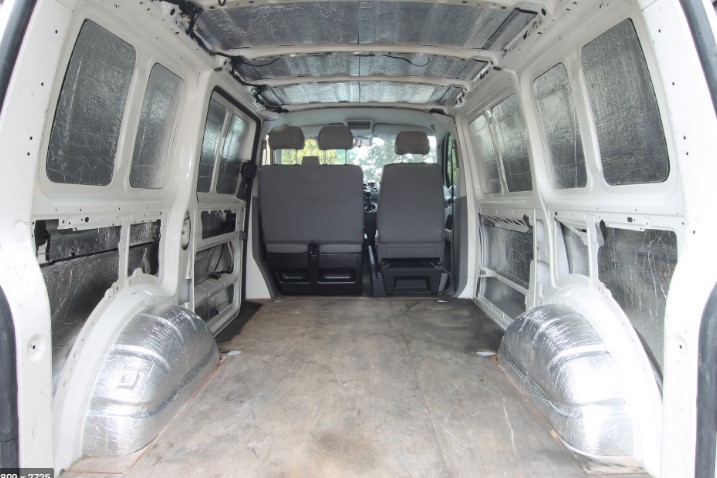
Interestingly, one of the key problems with sleeping in your van is condensation. At night, the metal surfaces of the van cool and any moisture in the warm air inside your van condenses on the walls of the van. The moisture can come from humidity, maybe cooking and even from our breathing. You may have experienced the same thing when sleeping in small tents.
The Kool Wrap Van Sound and Heat Insulation kit includes high mass adhesive vinyl panels that are adhered to the inside of the larger panels on the sides and ceiling of your van to stop the drumming effect or resonance caused by large panels of sheet metal. The kits also include either 7.5mm or the premium 10mm thick adhesive Van Liner that is applied all over the sides and ceiling to provide noise and heat insulation.
The Van Liner is made from a dense closed cell foam rubber synthetic material that traps air pockets and prevents high or low temperatures from penetrating into your van. The outer surface has a aluminium foil layer to reflect radiant heat or cold. It also creates a barrier that stops moisture from condensing on the walls of your van.
Kool Wrap also makes high density foam underlays that again act as a sound and heat insulator for the floor of your van.
If you are planning on building your own motorhome and want to explore Australia, call Kool Wrap today on 1300 44 33 34 and discuss your van insulation.

Kool Wrap has Van Insulation Kits for the following vans:
Here at Kool Wrap, we intend to embark on a series of bench tests to evaluate the performance of all of our heat protection products. But while we arrange the equipment to start these tests, we found a great video from the guys at Engineering Explained- a well known Youtube channel- where they used an Infrared camera and temperature data logger to test the heat generated by their Turbocharged GTi VW with and without a turbo blanket.
They used a Titanium Basalt Turbo Blanket of exactly the same construction as our Kool Wrap blankets. The results were definitely impressive.
The turbocharger without the blanket showed exhaust housing temps up to 500°C and these dropped to 160-200°C with the blanket fitted. This reduced engine bay heat was then shown to reduce the temperatures of nearby coolant hoses, the turbo to intercooler piping, the air intake and turbo oil lubrication line.
Check out the video below. The guys did a great job.

Can your car handle the heat? It’s a question that any revhead should ask themselves when it comes to their performance car. Heat management is one of the most important aspects of automotive design. So if you’ve modified your car for performance, you better hope everything is set up to handle that extra heat.
Components of your car like the engine, gearbox, and brakes rely on heat to work as intended. But if you apply too much heat to these components then it could result in a loss of performance or permanent damage. When high temperatures are generated in your car, it can also cause a significant amount of power loss.
If this is all news to you, then it’s time to listen up. The performance and safety of your car are at stake. The temperature of your car can be lowered to a safe range with the right accessories and gear. Thermal management products like heat shield tape are perfect for solving your performance car’s overheating issues. If you’d like to learn more, then read on to see our recommendations for heat shield tape and other heat shield protection products.
To properly manage heat in your car, it’s important to narrow down the problem areas. Find out which areas produce the most heat while running and you can focus on the components that need the most heat protection. Make the following components your top priority:
Located under the engine bay, the exhaust helps to dissipate heat from the engine. It’s the extreme heat travelling along the pipe of the exhaust you need to worry about. Applying heat shield tape or exhaust wrap to the exhaust pipe can help to protect engine components, wiring or hoses in or under your engine bay from excess heat. This can also help make your exhaust more efficient.
Kool Wrap Vermiculite Exhaust Wrap
This vermiculite treated exhaust tape is highly flexible and easy to wrap around your exhaust. Made from a specially trated fibreglass, this wrap is naturally resistant to heat with a melting point of 1093 degrees celsius. When applied correctly, this exhaust wrap can help reduce under-bonnet heat by as much as 50% to provide a cooler intake charge.

Under the bonnet of your car is where a vast majority of heat is produced. This heat production is caused by the placement of the engine. Turbo and supercharged cars are particularly susceptible to high engine bay heat. Engine bay temperatures can reach super hot levels that increase the risk of damaging the paintwork of your car’s bonnet.
Kool Wrap Adhesive Heat Shield
Our adhesive heat shield is perfect for under bonnet insulation. It’s made with an outer layer of reflective aluminium foil, insulating foam, fibreglass backing, and a pressure-sensitive heat resistant adhesive layer. Installing this heat shield can help block radiant heat from damaging your bonnet.

A turbocharger is responsible for increasing your car engine’s efficiency and power. It achieves this by forcing additional compressed air into the combustion chamber of the engine. With this performance upgrade comes additional and immense heat production. Components situated around the turbocharger are all at risk of excess heat damage if they’re not shielded correctly.
Kool Wrap Titanium Turbo Blanket
A turbo blanket can effectively prevent and isolate heat from your car’s turbocharger. These blankets can also help protect surrounding components such as plastic hoses and electrical wires. Our very own Kool Wrap Titanium turbo blanket is specially designed to reduce radiant heat coming from the turbocharger.
The outer layer of our turbo blanket boasts one of the highest heat ratings of any known material. The inner liner is made from high-temperature resistant silica insulation held in place with a stainless steel mesh and sewn together with kevlar stitching.

Looking to turbocharge the performance of your car? You’ll need to install the right heat shield protection to keep your car cool during peak performance. If you’re looking for more expert advice on car cooling, speak to the experts at Kool Wrap. As a leading supplier of Australian made cooling products, the team at Kool wrap can offer valuable advice to help you choose the right cooling products.
Ask the experts at Kool Wrap for advice on professional heat protection products.
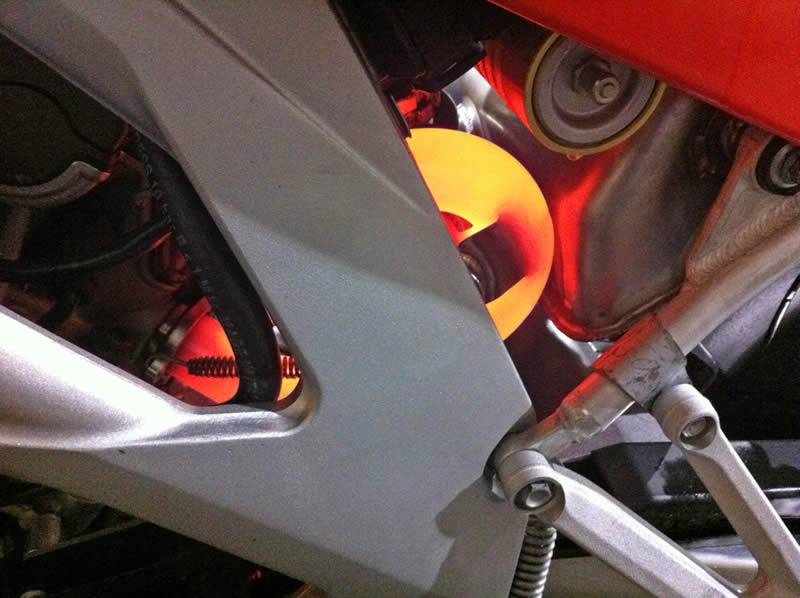
The highest temperatures that an exhaust manifold or exhaust pipe can reach are approximately 850°C (1,600°F).
As a general reference, metals start to turn red at 500°C and glow a dark cherry red at around 635°C (1,175°F).
The hottest parts of your exhaust system are usually:
A bend in the exhaust pipe near the cylinder head
Around the catalytic converter
As RPM or engine load increases, exhaust temperatures naturally rise — this is when the engine burns the most fuel and produces maximum torque or horsepower.
Tests show that for typical road vehicles:
Around 120°C (250°F) at 50 km/h (30 mph)
Up to 550°C (1,020°F) at 112 km/h (70 mph)
There are three main ways to protect nearby components from exhaust heat:
Insulate the exhaust pipe to retain heat within the pipe.
Install a reflective barrier with an air gap between the exhaust pipe and other components.
Add reflective and insulating materials to heat-sensitive parts that may be exposed to radiant exhaust heat.
We typically use exhaust wraps or tapes in a spiral pattern around the exhaust pipe or manifold to trap heat inside.
Tests show that exhaust wraps can reduce engine bay temperatures by up to 50%.
Common exhaust wrap materials include:
Fibreglass (melts around 815°C)
Silica
Basalt
Ceramic wraps
Many modern cars now feature embossed aluminium or steel heat shields to manage heat effectively.
These shields are mounted 1–2 cm away from the exhaust or manifold, allowing airflow through the gap to carry away excess heat.
Heat sleeves are used to protect cables, wires, hoses, and hard lines.
They’re typically made of aluminium foil laminated with fibreglass, offering both reflection and insulation.
Some sleeves use Mylar foil, which combines a thin metallic layer with a polyester resin outer layer and fibreglass insulation.
However, Mylar begins to burn off around 200°C (400°F).
At Kool Wrap, a thicker aluminium foil backed by fibreglass insulation is used, capable of withstanding temperatures up to 660°C (1,220°F).
This material comes in both sleeve and sheet forms, ideal for insulating components like starter motors or firewalls.
Air is an excellent heat insulator when trapped in small pockets.
It’s a poor conductor of heat but works well in convection (as seen in fan heaters).
Products like styrene foam or ceiling insulation batts trap air to block heat transfer — the same principle applies to exhaust wraps and fibreglass or silica blankets.
The air pockets between fibres reduce heat conduction effectively.
A common household example of this effect is double-glazed windows, which use trapped air to create a thermal barrier.
University of Washington: Underhood Surface Temperature Tests – Summary of Published Results
Installing exhaust wrap correctly helps protect nearby components from radiant heat and keeps the wrap secure on the pipe. The process is straightforward, but the details matter: preparation, tension, overlap and tie placement all affect the finished result.
This guide explains how to install exhaust wrap step by step, including how much wrap you need, how to prepare the pipe, whether you need to soak the wrap, how much overlap to use and what to expect when you start the engine.
For available materials, sizes and ratings, see the Kool Wrap exhaust heat wrap range.
Before starting, gather everything you need so you can complete the job without stopping halfway through.
You will need:
Work on a completely cool exhaust system. Exhaust components can remain extremely hot long after the engine has been switched off.
If you are removing the exhaust, label or photograph the connections before disassembly so everything can be returned to its original position.
The amount of wrap required depends on pipe diameter, pipe length, the number of bends and the amount of overlap.
A useful starting point is to calculate the circumference of the pipe, then allow for the additional length created by wrapping each turn with overlap.
For a straight section:
Wrap length ≈ pipe circumference × number of turns
The number of turns depends on the length of the pipe and the width of the wrap.
As a practical example, one metre of 50mm pipe wrapped with 50mm wrap at approximately 6mm overlap per turn needs about 3.7m of wrap. Add around 10% for bends and tie-offs.
For a four-cylinder set with 38mm primaries approximately 0.8m long, the calculation comes out near 10.2m, so a 15m roll gives you a safer margin.
If you are unsure, measure each pipe section and allow extra material for bends and finishing the ends.
Remove the headers or exhaust sections if the job allows it. Working on the bench makes it easier to maintain even tension and inspect the entire pipe.
Clean the pipe thoroughly before wrapping. Remove oil, grease, dirt, loose rust and other contamination.
If you are wrapping mild steel, deal with surface corrosion before installing the wrap. Apply high-temperature exhaust paint where appropriate and allow it to cure according to the paint manufacturer’s instructions.
Stainless steel should be clean and free from oil and dirt before wrapping.
Measure the pipe sections before cutting the wrap.
Start at the narrowest end of the pipe. On a header, this is usually the head end. On a straight exhaust section, it is normally the front.
Plan where your joins, bends and finishing points will be. Avoid placing unnecessary joins in awkward locations.
Fold the first few centimetres of wrap back on itself.
Position the folded end at the starting point and lock the fold underneath the first turn. This helps prevent the cut edge from fraying as you work.
Keep the wrap straight and apply consistent tension as you move along the pipe.
Work around the pipe one turn at a time.
Pull the wrap firmly enough to keep it secure, but do not stretch it excessively. The goal is an even, consistent fit without loose sections or bunching.
Follow the shape of the pipe through bends rather than forcing the wrap to sit flat where the pipe changes direction.
For complex headers, take your time around the collector and tighter bends. Uneven tension in these areas can create gaps or excessive overlap.
Overlap each turn by approximately 6mm.
Kool Wrap’s installation guidance allows around 5 to 8mm of overlap. Keeping the overlap consistent gives the finished wrap an even appearance and avoids unnecessarily building up thickness.
Too much overlap adds thickness and can hold more heat and water against the pipe.
One layer is the standard fit in the Kool Wrap installation guide.
Adding extra layers increases the thickness around the pipe. It can also hold more heat against the pipe wall and take longer to dry if the wrap becomes wet.
Unless your application specifically requires otherwise, install one even layer.
Secure the wrap at the starting point, along the pipe and at the finishing point using stainless steel ties.
Place the ties where they hold the wrap firmly without cutting into the material.
Tighten each tie securely, then turn or position the lock away from areas where it could contact wiring, boots, hoses or other components.
Check the finished wrap for loose edges or sections before reinstalling the exhaust.
At the end of the pipe, fold the wrap neatly and secure it with a stainless steel tie.
Avoid leaving loose material hanging from the end of the wrap.
Check around flanges, welds and other areas where the wrap may need to be trimmed for a clean fit.
Do not wrap components that should remain exposed.
Leave O2 sensors and flex joints bare. Leave catalytic converters bare unless the vehicle manufacturer specifically allows them to be wrapped.
The wrap should remain on the appropriate exhaust pipe sections rather than being extended over components that require their own operating or cooling conditions.
You can optionally seal the completed wrap with high-temperature exhaust paint.
This can help lock down loose fibres and protect the finished surface.
Follow the paint manufacturer’s application and curing instructions.
After installation, reinstall the exhaust and check that the wrap is clear of wiring, hoses, brackets, bodywork and other components.
Start the engine and allow the exhaust to heat gradually.
New exhaust wrap can produce light smoke and an odour during the first heat cycles. This is caused by binders in the material burning off and is generally normal.
The smoke should reduce and clear after the first few runs.
If smoke continues heavily, or you notice an oil or fuel smell, switch the engine off and investigate. Contamination on the wrap or an exhaust leak can produce different symptoms.
If you use a turbocharged vehicle, make sure surrounding components have sufficient clearance. If you also use a turbo blanket, check the manufacturer’s fitting instructions for the complete setup.
You do not have to soak it at all.
Kool Wrap exhaust wrap does not need wetting before installation. Some installers lightly spray wrap because damp material can pull tighter and shed fewer fibres during installation.
If you dampen the wrap, run the engine soon after installation so the heat can dry it out.
Do not leave damp wrap sitting on the exhaust pipe.
About 6mm per turn is a good target.
Kool Wrap’s installation guide allows approximately 5 to 8mm of overlap.
More overlap than necessary builds additional thickness around the pipe. It can also hold more heat and water against the exhaust.
Aim for a consistent overlap from one end of the pipe to the other.
Start at the narrowest end.
On a header, this is usually the head end. On a straight exhaust section, it is generally the front.
Fold the first few centimetres back on themselves and lock the fold underneath the first turn. This prevents the cut end from fraying as you continue wrapping.
Work towards the wider section while maintaining consistent tension and overlap.
Yes.
Exhaust wrap can be installed while the exhaust remains on the vehicle, particularly when access is good and the vehicle is safely supported.
However, working with the exhaust removed generally makes the job easier. It takes longer to maintain even tension when working underneath a vehicle, and you cannot inspect the far side of the pipe as easily.
If the job allows it, remove the pipes and wrap them on the bench.
Light smoke during the first heat cycles is normal.
Binders in the wrap burn off as the material reaches operating temperature. You may also notice an odour during the first few runs.
The smoke should reduce and clear after the first few heat cycles.
Smoke that continues, becomes excessive or smells of oil or fuel should be investigated. It may indicate contamination on the wrap or an exhaust leak.
Before considering the job finished, check the entire exhaust system.
Look for:
Once the system has completed its first few heat cycles, allow it to cool completely and inspect the wrap again.
For information on what to look for as the material ages, read how long exhaust wrap lasts.
If you are also concerned about the condition of the exhaust underneath the wrap, see whether exhaust wrap can damage extractors.
Not sure how much wrap your exhaust system needs? Send Kool Wrap your pipe sizes and lengths, or call 1300 44 33 34.
You can compare available wraps, ties and related products in the exhaust heat wrap range.
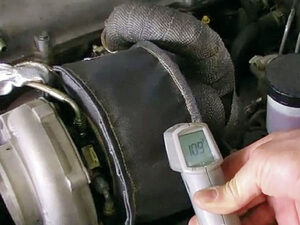
Turbo Blankets or Beanies where introduced for 4 key reasons:
Turbo Blankets have no doubt proved themselves to be very popular with turbo car owners, but will a Turbo Blanket really bring on Boost faster?
Luckily for us, graduate research assistant Steffen Bickle at the University of Texas decided to thoroughly investigate this theory.
Click HERE to read his paper.
The short version is, yes, Turbo Blankets or Turbo Beanies definitely do increase exhaust housing temperatures and help to build boost faster.
Steffan Bickle found that …..”With the turbo blanket mounted, the turbocharger shaft speeds exceeded their baseline counterpart for identical engine operating conditions which resulted in increased boost pressures throughout all tested steady state speed-load point”.
He went on to conclude…”The time-to-torque improvement with the PTP Turbo Blanket was significant, especially for the last case, in which we used a simultaneous tip-in of the speed and the load, the time-to-torque improvement was impressive with an instantaneous torque improvement of up to 140 Nm. This led to an acceleration advantage of 250 engine rpm in spite of the fact that the duration was less than 2.5 s for the entire event. The improvement of the turbocharger performance provided this engine performance advantage because the turbocharger spool-up was faster which resulted in a boost pressure advantage of up to 0.3 bar when the PTP Turbo Blanket was mounted”.
I think that we can safely agree that a Turbo Beanie or Turbo Blanket is a very cheap and easy addition to any Turbocharged Car and the benefits are proven.
Check our the Kool Wrap range of Turbo Blankets or Beanies