0 items - $0.00
No products in the cart.
Discover Kool Wrap’s latest products designed for automotive, marine, and industrial heat protection. Browse our innovative solutions and enhance equipment longevity today!
Most fear the potential damage of their motorcycle if they do choose to heat wrap their exhaust. However, there are many benefits by choosing exhaust wrap for your motorcycle that could, in turn, preserve the appearance and function of your motorcycle in the long-term.
Below are some pros of heat wrapping your motorbike exhaust:
Reduced engine temperature enhances the efficiency of the engine contributing to a smooth ride and better fuel efficiency.
With the exhaust heat wrap on, the heat stays within the pipe assisting the function of the exhaust pipe which is pushing out heat and smoke.
A cooler engine enhances the horsepower and helps the engine function with higher efficiency.
When the exhaust heat shield is installed properly you can avoid the discolouration of the exhaust pipe normally caused because of the excessive heat passing through the pipe when the motorcycle is in motion.
The exhaust wrap covers up the blemishes providing your motorcycle with a sleeker and cleaner finish.
The exhaust wrap can also act as a protective element. When you are riding your motorcycle, particularly over long distances, your feet stay pretty close to the exhaust pipes which are extremely hot and can potentially cause serious burns. With the exhaust wrap on the still gains some heat but can prevent the extremity of any burns to your feet and legs.
Installing exhaust wrap is a simple and easy process.
The whole process of installation can be achieved in less than an hour.
As this is an effective procedure that can be done in a timely manner you can start reaping the benefits of exhaust wrap quicker!
Apart from ease of installation, the exhaust wrap for your motorcycle is also a cost-effective approach to taking better care of your motorcycle, both now and in the long-term.
Usually, fibreglass wraps are priced below $50 for a roll that is 50’ in length. At best you may need two rolls depending on the way you apply it. If you are an expert with the task, you may even be able to accomplish with only one roll.
Difficult installation
It is essential to take extra care when it comes to the installation of your exhaust heat wrap as a poor method of installation can impact how it appears on your exhaust. It may not cover the exhaust how it’s meant to and can impact how it performs its function.
Water damage
If you are not using your motorcycle regularly and water seeps between the wrap and the pipe, it can hasten the rusting. With regular riding, you can combat this problem since water gets dissipated due to the heat.
Smoke and smell:
Post-installation, the exhaust wrap produces a significant amount of smoke and unpleasant smell. As a result of this you can’t ride your motorcycle for a few hours. If you do, you increase the risk for curing the wrap around the pipe causing marks that will stay permanently.
Overall, there are a variety of pros and cons to the installation of an exhaust wrap to your motorcycle. This is not an uncommon procedure and many in fact have credited wrapping their exhaust for preserving the appearance and operation of the motorcycle as years have progressed.
If you would like to learn more about our heat resistant wraps and exhaust heat shield wraps, please call us on: 0412 548 609 to speak with a member of our team today.
Since the 1960’s turbocharged engines have been moving people on the roads faster and faster. It is the engine that powers F1 cars as well as many of the ones that we see on the road from day-to-day. Turbocharged engines have a list of benefits that attract people to purchase them. Some of these include higher horsepower and lower emission for those concerned with the environment.
Turbocharged engines are designed in a specific way to give the car an extra boost. Although the design is not perfect, it is based off facts proven in physics that allows the car to create more horsepower meaning more speed.
For those who are unsure of how a turbocharger works, here is a basic overview:
Wasted exhaust gases enter the turbocharger at high pressure through an inlet port. From here, as the air passes through the turbine inside spinning it which also spins the compressor attached. This draws in large quantities of air which are compressed and pass out the of the outlet port. The more pressure created means the bigger the boost is.
Due to generating such a high heat, a turbocharger can cause drastic damage to a car above and below the hood.
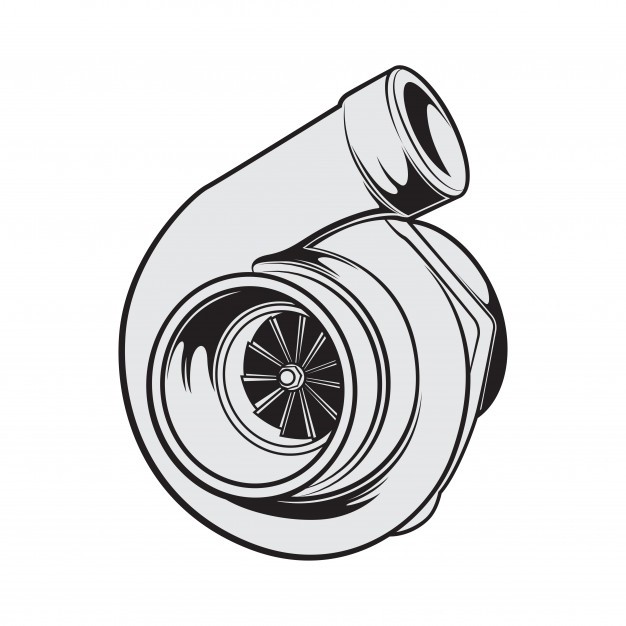
A solution has been created to not only decrease damage but increase the performance of your car. This is called the Turbo Blanket. Depending on the type purchased, turbo blankets are created from a number of materials such as:
Turbo Blankets come in different sizes to accommodate the wide variety of dimensions that turbochargers come in. The Turbo Blankets purpose is to keep the heat where it is supposed to be, but how do you know if it works? There have been multiple tests conducted on the efficiency of the product to understand if it is worth buying.
Once you have placed the Turbo Blanket over your turbocharger, several positive effects take place. These were proven through a number of tests and university level research conducted by:
In all of the experiments, the core purpose of the Turbo Blanket is tested. If it is effective, the heat within the turbocharger should be higher with the Turbo Blanket on. This also means that the area around the turbocharger will be a cooler temperature due to the heat being insulated and not released.
Throughout all three tests, there were dramatic heat differences inside and throughout the car. They tested parts such as the top and side of the turbocharger, the intake air, the exhaust gas, exhaust pipe and more.
Below are the results of the tests conducted:
These results show the considerable difference between using a Turbo Blanket on a Turbocharger and not utilising one. The Blanket ensures the engine is running more efficiently as the temperature and pressure are increased leading to the higher horsepower. It also secures the paint on the hood of your car, as well as its structure.
For many, a question may be how does the Turbo Blanket affect the oil temperature? That question is answered within the research. With only a 0.2ºC difference, the Turbo Blanket does not have much effect on the oil at all. The only recommendation would be to let your car run for a little longer after a drive to let the oil move out.
If you have a Turbocharger, it may be time to consider buying a Turbo Blanket to increase performance and protect your car. For more information on related heat protection products, please visit Kool Wrap.
Your home is much more than just a building. It is a place where we feel safe and relaxed and will protect at all costs. Sadly, most accidents are likely to take place in the home. A study reveals that most of the accidents happen due to appliances such as refrigerators, ovens or fireplaces that radiate excessive heat.
Fortunately, the advancements of modern technology mean that we now have access to heat solutions to keep your home safe. These heat protection products will not only protect your home but will also save you money on your household bills. Heat protection products are becoming a staple for most households with a variety of solutions to help safeguard your home.
Here’s a list of the best heat protection products on the market:
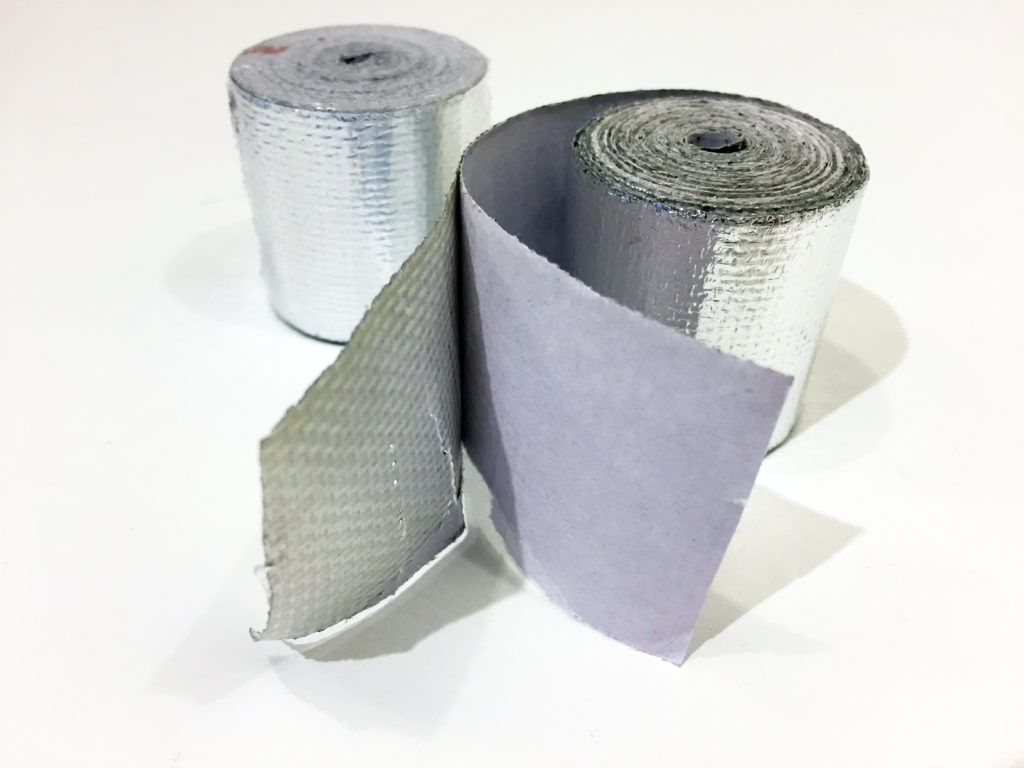
Kool Wrap adhesive tapes can direct excess heat away from pipes, cables and air inputs. They also allow excellent protection from condensation and radiation. The aluminium tapes are reinforced by a fibreglass layer. This increases the durability of the adhesive tapes making them more reliable. The Kool Wrap Adhesive tapes are available in two ranges:-
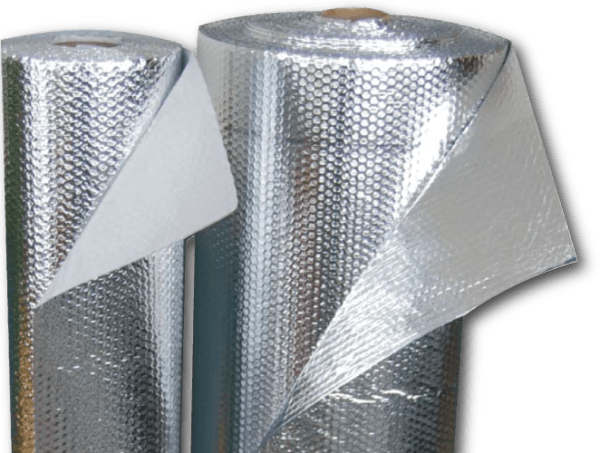
Foil Bubble Wrap is a light and durable product that is perfect for insulating homes. These heat solutions are designed for appliances that demand regular temperature restraints. The advantage of foil bubble wrap is that it is easy to install, waterproof and is capable of preventing radiant heat transfer, for both cold and hot. It is available in a silver colour that is composed of non-toxic elements. Thus, the foil bubble wrap is ideally a convenient choice over traditional insulators.
Heat-shield products can be used anywhere in your living room or kitchen where radiant heat may pose a threat to the safety of your home. They are commonly used at places in the kitchen where an oven or a fridge is placed as the radiating heat may damage surrounding cabinets or drywall. Also, these heat shield products are used near fireplaces as the excessive heat can result in ruining the bricks and initiate cracks in the mortar.
Created from a reflective aluminium foil-lined insulation fibreglass, Kool Wrap’s Heat Sleeves are an effective heat solution. Based on their application, the products are split into two categories-
Because of their effectiveness and excellent performance, heat sleeves insulation products are widely used in homes and workplaces.
The above-mentioned heat protection products are manufactured by the experienced team at Kool Wrap. The products are durable, reliable and built to withstand anything. Every product is specially designed to shield heat, reduce the bills, increase the efficiency and protection of your home. The best part? Every heat protection product from Kool Wrap comes with an assurance of express delivery in Australia and worldwide! So, don’t wait any longer to safeguard your home from the dangers associated with heat radiation. Experience our cost-effective heat solutions for yourself and rest assured that your home and family are protected by the best!
We are often asked for a solution to a heat problem and the first thing we think about is whether the problem is caused by conduction, convection or radiation.
We will try to keep this simple.
The actual answer is usually a combination of all three, but one heat transfer method is usually the dominant factor.
Conduction is the direct transfer of heat through matter caused by the temperature differential between the two objects. If we have a cast iron exhaust manifold and we attach an aluminium heat shield directly to that manifold, the heat energy will flow into the aluminium heat shield until they are approximately the same temperature.
In this example, the heat shield is ineffective.
To protect something from heat conduction, we need to put a barrier between the hot object and the object we are trying to keep cool.
For instance, we could mount our aluminium heat shield any distance away from the hot exhaust manifold with spacers. The heat shield now feels zero conducted heat, but will still feel radiated heat.
Another example of this would be placing your hand against a hot oven glass door. You would probably burn your hand. Move your hand away from the door by 20mm and although you would still feel radiated heat, there would be no more conduction.
Then place an aluminium panel half way between the hot glass oven door and your hand and you will feel very little heat. The aluminium panel has blocked radiated heat.
As mentioned above, convection is heat transfer by actual movement of matter through a fluid. In this definition fluids include liquids and gases.
An electric fan heater is a good example of convection. The fan forces air to flow over a hot electrical element. The air is heated by the element and then blown out into the room.
Another example is a car radiator. Water flows through an engine and is heated by the hot engine block. This heated water is pumped through the radiator. The radiator is cooled by the flow of cold air through the front of the car. The hot water flows through the cool radiator and heat transfers from the water to the radiator. The warming radiator then passes that transferred heat back to the air as it flows through the radiator.
In the heat protection industry, we may choose to divert the flow of hot fluids (air or water) away from the object that we are trying to keep cool.
Radiation occurs where heat is transferred as electromagnetic waves. If you hold your hand up to the sun, or next to a hot exhaust manifold (ignoring air flow) you will feel the radiant energy coming from the sun or hot object.
We can protect items from radiant heat by placing a barrier between the radiant heat source and the item we want to protect.
Our job at Kool Wrap is to project operators and heat sensitive components from heat transferred by Conduction, Convection and Radiation.
One of the most used insulators is actually air.
If we consider roof insulation, we use a variety of products such as fibreglass batts to create a layer of trapped air pockets.
The technical reason why air is a poor conductor of heat is that the air molecules are not in continuous contact with each other. The air pockets in fibreglass or bubble wrap insulation, cannot move around and transfer heat.
Remember that heat will only transfer to something that is cooler. If the heated air is prevented from touching cooler air, then the heat cannot be transferred. If we are using the ceiling insulation example, in summer, the heated air inside your roof, cannot transfer heat through the insulation.
In an industrial or automotive setting, we can use fibreglass tape or lagging to wrap around an exhaust pipe and that tape will contain thousands of tiny air pockets that can help prevent the heat transfer process.
If you have questions about your heat transfer problems, call Kool Wrap today and we will help you to find a solution.
The short answer is yes. Most fibreglass and basalt insulation products will emit some smoke during their first heat cycle.
During the production process for glass fibre fabrics, binders or specially formulated starches are used to lubricate the fibres and hold them in their woven pattern.
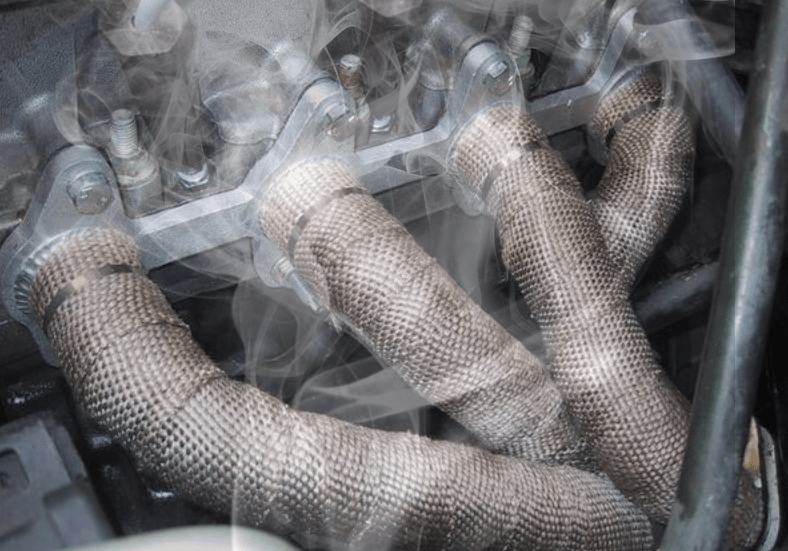
When subject to high temperatures these starches or binders can evaporate or burn off causing smoke to be emitted by the fibreglass tapes or fabrics. This causes no damage and is quite normal although it can be a little scary if you are not expecting it.
The smoking will not last long as is simply a normal occurence.
We have had some phone calls recently from customers that have experienced heat damage to their kitchen cabinets caused by a hot oven.
One customer said “My under bench 90cm Whirlpool oven (2 yrs old) is burning the cabinet which is to the left of it. The vinyl wrap has warped and there is a permanent yellow stain”.
There are a combination of factors that can cause an oven’s excess heat to damage to your kitchen cupboards and cabinets.
Insufficient air gap between the oven and the cabinets:
Kool Wrap is a specialist heat protection products company and we have developed a heat insulation kit that can help protect your valuable kitchen.
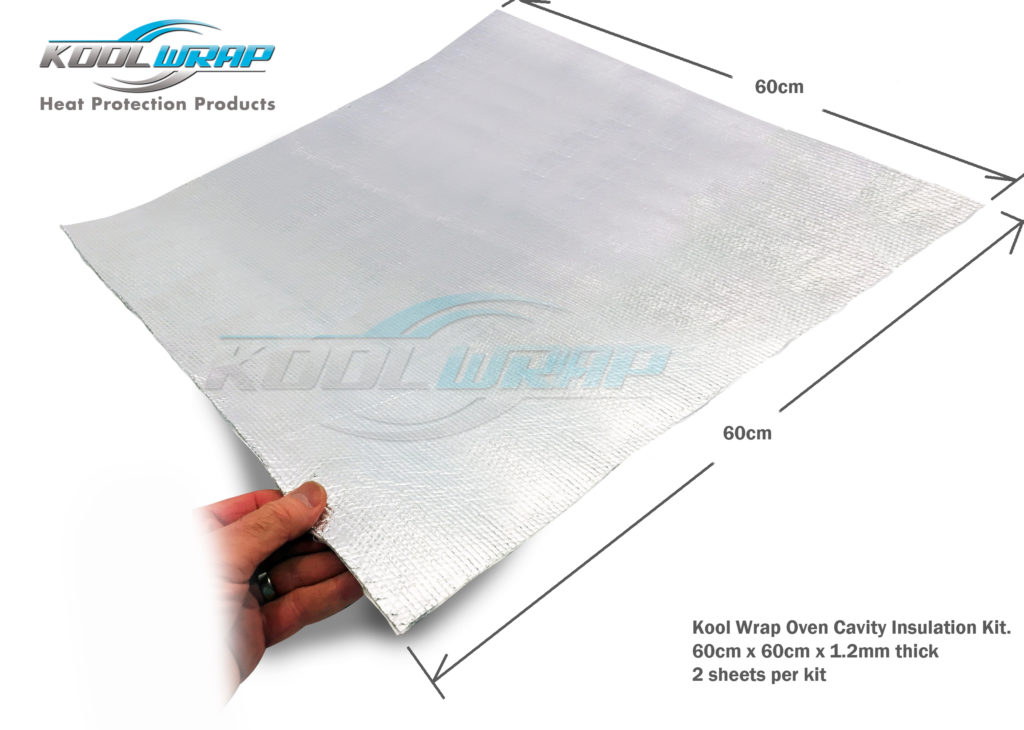
The Kool Wrap Oven Cavity Heat Protection Kit consists of 2 sheets of heat insulating fibreglass with a self adhesive layer on the back. Simply peel off the back paper and stick to the left and right sides of the oven cavity.
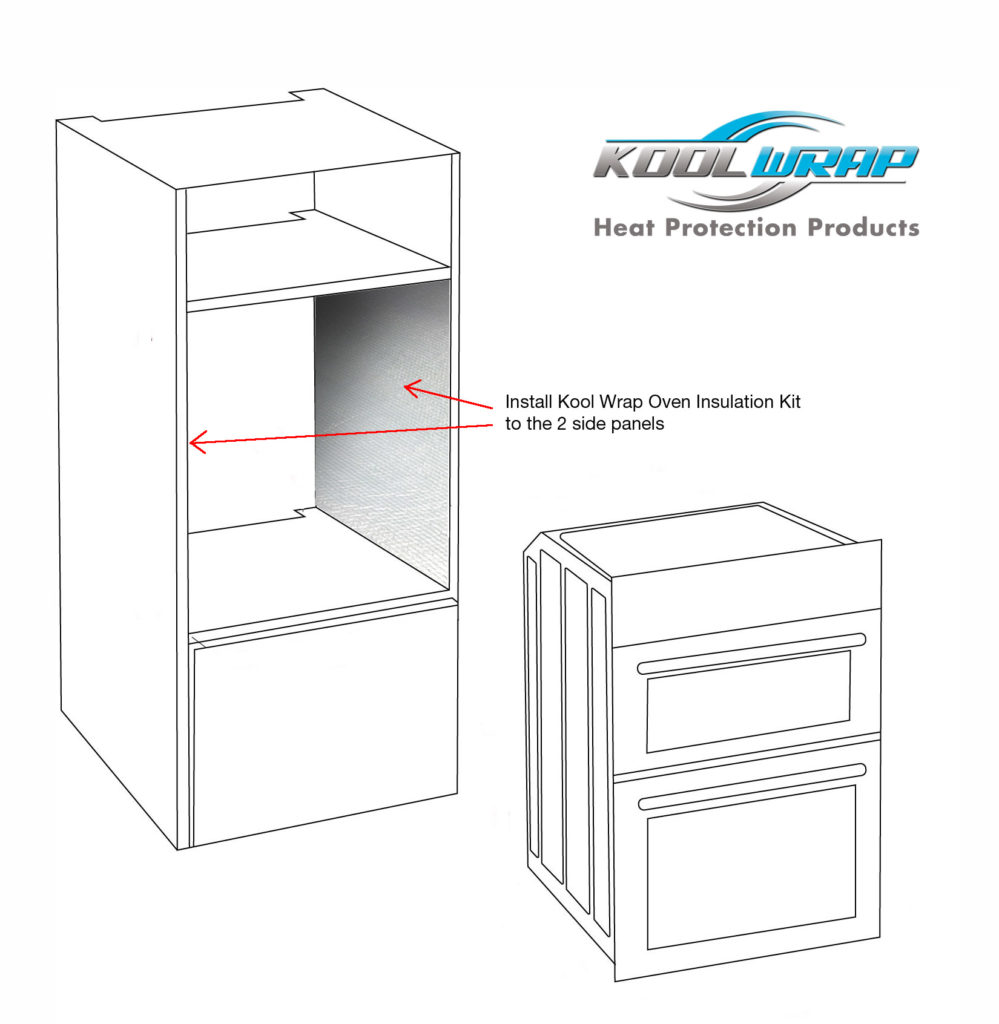
The sheets also have an outer layer of heat reflective aluminium foil to reflect damaging heat radiation back away from your cabinetry. This foil can withstand temperatures up to 660°C, far higher than a typical oven.
The sheet material can be cut with scissors and should take no more than 5-10 minutes to install.
Click HERE to view the kit.
Wrapping super hot engine exhaust pipes in a high temperature resistant insulating tape has become more popular recently for a number of reasons.
Kool Wrap manufacturers a range of wraps with the Basalt Titanium Wrap being the highest quality wrap in the range.
Remarkably, Basalt (often known as Lava Rock) is produced by melting down carefully chosen rock formations that are the result of volcanic activity. The molten rock is then forced through an extruding machine to produce very fine strands of glass fibre that are then woven into various products. These strands have a filament diameter of 10-20um which is far enough above the respiratory limit of 5um to make it suitable replacement for asbestos.
Basalt fibers are known to be 25% stronger than regular glass fibers and are often used in producing composites that are very similar to carbon fibre.
Wikipedia also quotes, Basalt Fibres “……….also have a high elastic modulus, resulting in excellent specific strength—three times that of steel. Thin fiber is usually used for textile applications mainly for production of woven fabric. Thicker fiber is used in filament winding, for example, for production of CNG cylinders or pipes. The thickest fiber is used for pultrusion, geogrid, UD, multiaxial fabric production and in form of chopped strand for concrete reinforcement. One of the most prospective applications for continuous basalt fiber and the most modern trend at the moment is production of basalt rebar that more and more substitutes traditional steel rebar on construction market.
Installing exhaust wrap correctly helps protect nearby components from radiant heat and keeps the wrap secure on the pipe. The process is straightforward, but the details matter: preparation, tension, overlap and tie placement all affect the finished result.
This guide explains how to install exhaust wrap step by step, including how much wrap you need, how to prepare the pipe, whether you need to soak the wrap, how much overlap to use and what to expect when you start the engine.
For available materials, sizes and ratings, see the Kool Wrap exhaust heat wrap range.
Before starting, gather everything you need so you can complete the job without stopping halfway through.
You will need:
Work on a completely cool exhaust system. Exhaust components can remain extremely hot long after the engine has been switched off.
If you are removing the exhaust, label or photograph the connections before disassembly so everything can be returned to its original position.
The amount of wrap required depends on pipe diameter, pipe length, the number of bends and the amount of overlap.
A useful starting point is to calculate the circumference of the pipe, then allow for the additional length created by wrapping each turn with overlap.
For a straight section:
Wrap length ≈ pipe circumference × number of turns
The number of turns depends on the length of the pipe and the width of the wrap.
As a practical example, one metre of 50mm pipe wrapped with 50mm wrap at approximately 6mm overlap per turn needs about 3.7m of wrap. Add around 10% for bends and tie-offs.
For a four-cylinder set with 38mm primaries approximately 0.8m long, the calculation comes out near 10.2m, so a 15m roll gives you a safer margin.
If you are unsure, measure each pipe section and allow extra material for bends and finishing the ends.
Remove the headers or exhaust sections if the job allows it. Working on the bench makes it easier to maintain even tension and inspect the entire pipe.
Clean the pipe thoroughly before wrapping. Remove oil, grease, dirt, loose rust and other contamination.
If you are wrapping mild steel, deal with surface corrosion before installing the wrap. Apply high-temperature exhaust paint where appropriate and allow it to cure according to the paint manufacturer’s instructions.
Stainless steel should be clean and free from oil and dirt before wrapping.
Measure the pipe sections before cutting the wrap.
Start at the narrowest end of the pipe. On a header, this is usually the head end. On a straight exhaust section, it is normally the front.
Plan where your joins, bends and finishing points will be. Avoid placing unnecessary joins in awkward locations.
Fold the first few centimetres of wrap back on itself.
Position the folded end at the starting point and lock the fold underneath the first turn. This helps prevent the cut edge from fraying as you work.
Keep the wrap straight and apply consistent tension as you move along the pipe.
Work around the pipe one turn at a time.
Pull the wrap firmly enough to keep it secure, but do not stretch it excessively. The goal is an even, consistent fit without loose sections or bunching.
Follow the shape of the pipe through bends rather than forcing the wrap to sit flat where the pipe changes direction.
For complex headers, take your time around the collector and tighter bends. Uneven tension in these areas can create gaps or excessive overlap.
Overlap each turn by approximately 6mm.
Kool Wrap’s installation guidance allows around 5 to 8mm of overlap. Keeping the overlap consistent gives the finished wrap an even appearance and avoids unnecessarily building up thickness.
Too much overlap adds thickness and can hold more heat and water against the pipe.
One layer is the standard fit in the Kool Wrap installation guide.
Adding extra layers increases the thickness around the pipe. It can also hold more heat against the pipe wall and take longer to dry if the wrap becomes wet.
Unless your application specifically requires otherwise, install one even layer.
Secure the wrap at the starting point, along the pipe and at the finishing point using stainless steel ties.
Place the ties where they hold the wrap firmly without cutting into the material.
Tighten each tie securely, then turn or position the lock away from areas where it could contact wiring, boots, hoses or other components.
Check the finished wrap for loose edges or sections before reinstalling the exhaust.
At the end of the pipe, fold the wrap neatly and secure it with a stainless steel tie.
Avoid leaving loose material hanging from the end of the wrap.
Check around flanges, welds and other areas where the wrap may need to be trimmed for a clean fit.
Do not wrap components that should remain exposed.
Leave O2 sensors and flex joints bare. Leave catalytic converters bare unless the vehicle manufacturer specifically allows them to be wrapped.
The wrap should remain on the appropriate exhaust pipe sections rather than being extended over components that require their own operating or cooling conditions.
You can optionally seal the completed wrap with high-temperature exhaust paint.
This can help lock down loose fibres and protect the finished surface.
Follow the paint manufacturer’s application and curing instructions.
After installation, reinstall the exhaust and check that the wrap is clear of wiring, hoses, brackets, bodywork and other components.
Start the engine and allow the exhaust to heat gradually.
New exhaust wrap can produce light smoke and an odour during the first heat cycles. This is caused by binders in the material burning off and is generally normal.
The smoke should reduce and clear after the first few runs.
If smoke continues heavily, or you notice an oil or fuel smell, switch the engine off and investigate. Contamination on the wrap or an exhaust leak can produce different symptoms.
If you use a turbocharged vehicle, make sure surrounding components have sufficient clearance. If you also use a turbo blanket, check the manufacturer’s fitting instructions for the complete setup.
You do not have to soak it at all.
Kool Wrap exhaust wrap does not need wetting before installation. Some installers lightly spray wrap because damp material can pull tighter and shed fewer fibres during installation.
If you dampen the wrap, run the engine soon after installation so the heat can dry it out.
Do not leave damp wrap sitting on the exhaust pipe.
About 6mm per turn is a good target.
Kool Wrap’s installation guide allows approximately 5 to 8mm of overlap.
More overlap than necessary builds additional thickness around the pipe. It can also hold more heat and water against the exhaust.
Aim for a consistent overlap from one end of the pipe to the other.
Start at the narrowest end.
On a header, this is usually the head end. On a straight exhaust section, it is generally the front.
Fold the first few centimetres back on themselves and lock the fold underneath the first turn. This prevents the cut end from fraying as you continue wrapping.
Work towards the wider section while maintaining consistent tension and overlap.
Yes.
Exhaust wrap can be installed while the exhaust remains on the vehicle, particularly when access is good and the vehicle is safely supported.
However, working with the exhaust removed generally makes the job easier. It takes longer to maintain even tension when working underneath a vehicle, and you cannot inspect the far side of the pipe as easily.
If the job allows it, remove the pipes and wrap them on the bench.
Light smoke during the first heat cycles is normal.
Binders in the wrap burn off as the material reaches operating temperature. You may also notice an odour during the first few runs.
The smoke should reduce and clear after the first few heat cycles.
Smoke that continues, becomes excessive or smells of oil or fuel should be investigated. It may indicate contamination on the wrap or an exhaust leak.
Before considering the job finished, check the entire exhaust system.
Look for:
Once the system has completed its first few heat cycles, allow it to cool completely and inspect the wrap again.
For information on what to look for as the material ages, read how long exhaust wrap lasts.
If you are also concerned about the condition of the exhaust underneath the wrap, see whether exhaust wrap can damage extractors.
Not sure how much wrap your exhaust system needs? Send Kool Wrap your pipe sizes and lengths, or call 1300 44 33 34.
You can compare available wraps, ties and related products in the exhaust heat wrap range.
Most workers feel comfortable and therefore work efficiently when the air temperature is between 20°C (68°F) and 27°C ( 80°F) and relative humidity ranges from 35 to 60% (sourced from the Canadian Centre for Occupational Health).
The CCOH article continues saying “The healthy human body maintains its internal temperature around 37°C. Variations, usually of less than 1°C, occur with the time of the day, level of physical activity or emotional state. A change of body temperature of more than 1°C occurs only during illness or when environmental conditions are more than the body’s ability to cope with extreme heat”.
As the work environment warms-up, the body tends to warm-up as well. The body’s internal “thermostat” maintains a constant inner body temperature by pumping more blood to the skin and by increasing sweat production. In this way, the body increases the rate of heat loss to balance the heat burden. In a very hot environment, the rate of “heat gain” is more than the rate of “heat loss” and the body temperature begins to rise. A rise in the body temperature results in heat illnesses.
Heat stress can occur in many workplaces including engine rooms, vehicles, shipping, bakeries, furnaces, foundries, glass production, outdoor construction, laundries, kitchens etc.
These hot environments reduce worker efficiency and:
Kool Wrap products can assist workers by insulating or deflecting heat away from the work area.
We have recently completed projects on diesel generators exhaust pipes and turbochargers and even exhaust pipes on fishing vessels.
Call Kool Wrap today and discuss your work place heat protection problems.